Showing posts with label xna. Show all posts

Wednesday, September 30, 2015

Squares Vs Circles now out on Android

I've been spending my time recently recreating and upgrading my Squares vs Circles game that I originally released on Windows phone. 

It's actually been on the play store for a little while now. That has given me plenty of time to find and fix any lingering bugs. Upgrades and leader boards are brand new features for the android version as well as many small graphical upgrades. 

It's been an interesting time, developing this game that is. It's made using the unity engine. I have been spending my time learning the engine since I left college and I love it. It's much quicker to get to the actual game mechanic scripting side of things with Unity as the engine is already there. With XNA you had to pretty much create your engine before you had any fun, but with unity you just get straight to it.

Anyway here's a link to the game. Give it a go and maybe give me a rating if you can.

Monday, December 2, 2013

Find the maximum screen resolution in Monogame or XNA

There are many ways to find the max screen resolution in XNA, however many of these do not work with Monogame. After some experimentation I have managed to find one that does.

The lines of code above should give you the actual width and height of the screen in pixels.

Saturday, January 26, 2013

Random 2D Terrain in XNA

I've been messing around with xna again recently after a brief spell with the UDK. I have been a long time fan of Terraira and was wondering how they managed to create the random terrain for their game. I searched around and came across this. The midpoint displacement algorithm. I tried doing this for a while to no avail. I was confident that I could get it to work given enough time however since going back to college I have very little time for side projects. This got me thinking, there had to be an easier way to do this. Instead of starting off with one line and then breaking it up into smaller and smaller ones, why not just start off small and use a similar technique to randomise the height of the next small line. This was the result.
The white line is the random terrain. I started off by stating the total map width. This is in pixels. Then I stated how detailed I want the map by giving a total number of points to be generated. I then  calculated how far apart the points should be by dividing the width in pixels by the number of points. I then generated the first line. I used the end point of the first line as the start point of the next line and generated a random height for the end point of that line within a certain predetermined range. Repeat this for as long as you want and you get the result above. It is also possible to get a better result by increasing the random height range.
The result is kinda cool. I may post source code someday but for now I will continue my experiments.

Update: As requested here is the source code.

Friday, January 25, 2013

XNA Tutorial:2D Shooting Part 2

A while ago I created a tutorial for shooting bullets out of a rocket in nay direction. The method used, while functional, is not very re-usable. In this tutorial we are going to re-factor the previous shooting tutorial. It is recommended that you finish this previous tutorial as we will be using that project.

Firstly you need to create a new game component. Call it ProjectileManager. This will be the place where we will manage our bullets. You need to ensure that instead of just inheriting from Microsoft.Xna.Framework.GameComponent change it to DrawableGameComponent as this will allow us to add a draw method to this game component.

You must then add a draw method to the game component just like the following. In here we will draw our bullets.

Next we will add a few variables and instantiate them in the constructor. As you can see, the list of bullets and the texture are both static. This is because we will be referencing them later is a static method. I'll explain further later.

Now we need to add an enum for bullet types. Enums are types that allow you to assign names to integer values. Add the following line to Bullet.cs file. Add is so that it is outside the bullet class. Next we will need to add a new property to the bullet class. This will be of type BulletType. We will need this if at some point in the future we create enemies that are capable of shooting back at the player. With this new property we will need to modify the constructor for the bullet class. We need to add a new parameter for the bullet type. Modify the constructor so it looks like this: Go back to the ProjectileManager. The next thing we need to do is add a public static method to add a new bullet to the bullet list. A public static method allows us to be able to access this method anywhere in the code. In this case by just typing ProjectileManager.AddBullet(methodParameters). Create a new method and make sure it looks like the following code. Next we need to be able to update the bullets in the projectile manager. We have pretty much already written this code in the rocket class all you really need to do is cut and paste the bullet update loop code over to the update loop of the projectile manager. Within the update for the projectile manager you should have to following code. Make sure you have also removed this code from the rocket class.

The exact same needs to be done for the drawing loop. Cut and paste the bullet drawing loop from the rocket class to the projectile manager draw method. The following code should now be in your draw method for the projectile manager. Before we continue make sure you no longer have code in the rocket class for updating and drawing bullets. You may also remove the list of bullets and bulletTex from the rocket class. You must also remove the bulletTex parameter from the rocket constructor and any other bulletTex code from the constructor. The constructor should now look like the following. next we need to use the new method we created in the ProjectileManager class. The rocket update method should now look like this: You may have notices that if you build your project you are still getting a few errors. We will work on fixing these next.

Go to the Game1 class. Go to the load content method to where we are instantiating the rocket. Remove the parameter for the bullet texture. It should now look like this. Next just above this line of code, still within the load content method, Create a new instance of the projectile manager. Now go down to the draw method in the Game1 class and move the spritebatch.end so that is appears after the base.Draw(). We do this to allow our projectile manager to draw with the same spritebatch. The base.Draw() updated the draw method of all the game components.

You should now be able to run the game. You may have noticed that the bullets are being drawn on top of the rocket. To fix this go back to your code. We must change the draw order. Go to the bullet class and to the draw method. change the last parameter to be less that 1.0f. I put it to 0.8f. Then go to the Game1 draw method and modify the spritebatch.begin method to look like the following. Now run the game and it should work perfectly.

Now the code is set up in such a way as to allow us to add enemies at some stage in the future. If you see any typos or mistakes please let me know.

Here is the source for the finished project.

Thursday, September 27, 2012

XNA Tutorial: Basic Tile Engine Part 2

I thought it was time to upgrade the tile engine we made in this tutorial. If you haven't done that tutorial then either work your way through it or just download the solution from the link at the bottom of the post (I recommend trying to work your way through it. It should only take a few minutes). Our old tile engine wasn't very good. The layouts of the map were hard coded and that's almost always a bad idea. So in this tutorial we are going to set it up to layout our map from a text file rather than a hard coded array and we are also going to re-factor our old code into a separate class.

Firstly as stated above either work your way through the tutorial or just download the solution as we are going to be working straight from that. When you open it and have a look, you will notice that all the code in located in the Game1.cs class. We are going to change that. Right click on your project and add a new class. Call it Map. Add your using XNA statements at the top and then inside the map class copy the following code from the game1 class.
We will keep those in the game1 class as well for the time being. Next we will create a constructor for the map class. before we go on make sure you add "using Microsoft.Xna.Framework.Content;" at the top of the class as we will need it next. Add the following just after the lines we just wrote.
We added the name overload here so we know the file we need to look for later on. We have content here to allow us to load the textures we will need. Next we will need to create a method that will load in the textures we need. We can just copy the code directly from the load content method in the game1 class. Add the following after the constructor.
Once you have written that go back up to your constructor and add a call to this method like this:
LoadTileTextures(content);

Now we will create our draw method. You can copy this code directly from the draw method in the game1 class. Skip a few lines between the constructor and the LoadTileTextures method and add the following.
Next up we will add a file to load data from. Right click on your project and add a new folder. Call it MapLayouts. Then right click on that folder and add a new text file. Call it Level1. Now select Level1.txt and in the properties window(if properties window is not visible go to View>Properties Window) and set Copy to output directory to Copy Always. This is very important as if it does not copy all the time our program will not be able to see the file. Your folders should look something like this.
After that we need to set up our method for reading in the level file. Add another using statement at the top this time put "using System.IO;". After that create the following method.
The first part of this method is for getting the width and height of the text file. File.ReadLines looks at our file and reads how many lines is contained within the text file, thus giving us a value for the height of the tileMap array. To get the width we have to do something a little more complicated. First we have to open the stream reader and read the first line. In our level file we will place a comma between the numbers.This gives us the character we need to split up the line and place each of those splits into a string array. We can then use the count of that array as the width of the tileMap array. Then we instantiate the tileMap.

Next we need to add more code into this method to replace the numbers in the tileMap array with the numbers in the string array. Skip a line after sReader.Close() and add the following code.
First we re-instantiate the sReader. This is to avoid getting errors when we loop through the lines and to make the logic easier. Next we create two for loops using the width and height we obtained in the top of this method. Inside the y loop we read a new line and split it up in to an array of strings like we did above. Then in the x loop we are inserting the number in the string array into the tileMap.

Before we go any further we need to add some data to the Level1.txt file. Double click on the Level1.txt file in the solution explorer and add some data like the following. Note: placement of the commas are very important. Be sure not to leave one at the end of the line or this will cause errors in our code.
Last thing we need to do is clean up the Game1 class go to it now. You can pretty much delete all the code we wrote in the last tutorial leaving only the code that was generated for us when we created the project. Up above the Game1 constructor just down form the spritebatch line add this line: "Map map;". Now skip down to the load content method still in the Game1 class. Once there add the following line.
Now skip down to the draw method and add these few lines of code.
And were finished. Save your project and press F5 to run. You should see something like this.
That's it. If you see something like this then is has worked.

If you spot any typos in this post or have any problems please let me know. I have included a link to the source of this project below.

SimpleTileEngineUpdated.zip

Friday, July 13, 2012

XNA Tutorial: Smooth Sprite Rotation

Its been a while since my last post. I've bee pretty busy since. You may not have heard but me and my friends have started a games company(Unlucky For Some Studios). So that's been keeping me busy. Any ways a while ago I wrote a tutorial about sprite rotation. Recently I have been experimenting with lerping rotation values so the sprite appears to be rotating smoothly. I have been using the MathHelper.Lerp method to do this. Initially I thought this would work perfectly however I was getting a weird behaviour shown in the following video.
I have a pretty good idea as to what is causing this but explaining it would be kinda hard. I have said may times that I am just crap at Maths and was unable to figure out this problem myself. After a very long google search I managed to find the solution. I thought I would write a blog post about it and hopefully it will make it easier for other people to find and fix.

I used the following code that I found on app hub.
After I used these methods I got the following result which was exactly what I originally set out to do. Instead of calling MathHelper.Lerp you now call CurveAngle and pass in the same parameters.
I hope this helps someone as it helped me. Also give our game a go.

Saturday, June 16, 2012

XNA Tutorial - Basic Tile Engine

Its been a while since my last blog post and tutorial so I thought I'd do another. I have recently been working on a tile based game and found them very interesting so I thought I'd do a tutorial on a really basic tile engine and expand on it in future blog posts.

First of all you will need to download the graphics pack here. These are just really basic examples of tiles you might find in a tile engine.

In Visual Studio create a new windows game and call it SimpleTileEngine. I like to remove all the comments in the Game1 class. I find it makes my code look messy.

For our tile engine we will use a 2 dimensional array of ints. This is the easiest way to represent a tile engine. While were at it we will also create a list of tile textures.
We will use tileWidth and tileHeight to calculate the position of tiles later in the draw method.

Next we need to initialize our variables.
We load our textures into a list of textures and initialize 2D array of ints. You can see there are different numbers in the array. These numbers directly correspond to the index of that texture in the list of textures. As long as you don't have a number that is larger than the amount of textures in the list of textures it should work fine.

We don't need anything in the update method all our work from here is in the draw. In the draw we need to loop through each tile in the tile array to draw them. In a 2D array the Y value that you see in the code below is actually the row number. We get this number by calling tileMap.GetLength(0). The X is the index of a number in that row like a column. This is reason the x and y are mixed up in the line tiles[tileMap[y, x]]. tileMap[y, x] returns the number in the row y and column x which corresponds to the index of the texture in the textures array as explained above. To get the correct position to draw the tile we need to use the tileWidth and tileHeight we declared above.

After that were finished. Press F5 to run and you should see this.
You can increase the amount of tiles that are drawn by just increasing the size of the array just like below.

It should look bigger like this

Download the finished solution here.

Were pretty much finished. I hope you found it enjoying. If you have any questions or spot an error let m know in the comments below.

Sunday, February 19, 2012

XNA Tutorial: 2D Shooting

In this tutorial we are going to build on what we did in the last one and make a shooting rocket. I have refactored the code we did the last tutorial into classes and methods. Before we start you are going to have to download the project file here.

After you have downloaded the project file and opened it the first thing to do is add a new class and call it Bullet. We are going to model this class on our rocket class. Add your using directives.
Now we need to add these properties.
Now lets create our constructor and the update method. It's relatively similar to the rocket constructor and update. The only thing that's missing is the rotation. The draw method will also be nearly identical to the draw method of the rocket class. The fact that the bullet class and the rocket class are so similar would mean that we could have used inheritance. Where we would create a base class let's say a "Sprite" class and have both the rocket and bullet classes inherit from the sprite class. Perhaps in a future tutorial we will do that but for now lest stick with this method.

Now that the boring part is complete let's think about how we will handle the bullets. We want the player to be able to shoot a bullet every time they press the left mouse button and have it continuously shoot if they have it pressed down.

Next we need to modify the rocket class the rocket class will manage the bullets. Add these at the top below the properties and before the constructor. Now modify the constructor so if looks like the following Next thing to modify is the update method. In here we want to check if IsShooting is true and if it is increase the shot timer. If the shot timer is greater than the time between shots then we create a new bullet and give it the the same position and direction as the rocket and add it to the list of bullets. After we do that were going to have to loop through the list of bullets and update each one. We also need to check if the ActiveTime(the max time it can be drawn for) is greater than the TotalActiveTime(the current amount of time the bullet had been drawn). If it is we remove it from the list. That's most of it done. Now all we need to do is draw them and check if the left mouse button has been clicked. To draw the bullets go to the draw method in the rocket class and add the following just above where your drawing your rocket. One more thing we need to change before checking for the mouse button press. Go to the Game1.cs file and up in the LoadContent method you will see where we instantiated the rocket. Modify it so it looks like this. Now Finally we can check for the mouse button press. Go to the update method of the Game1 class and you should see that we are already checking for our mousestate we will use this variable now. Just after the line that updates the rotation of the rocket at the following code. There we have it, press f5 and run the game to see what you have created. When you press and hold the left mouse button the rocket will shoot bullets in the direction of the mouse cursor. Here is a video of what you should see.

I hope you found it interesting. If you find a typo or a mistake anywhere or have any questions please leave a comment below.

Next go to part 2, where I show you how to improve this system.

Sunday, January 29, 2012

More Progress

It's been a while since my last post. I have been quite busy with the game and with my college work but I though it was time for another progress report.

Since my last progress report I have been mostly working on Squares Vs Circles TD. Working on removing game breaking bugs and you know other small things like that. It's very close to moving out of alpha and into beta. Here are a few screens.
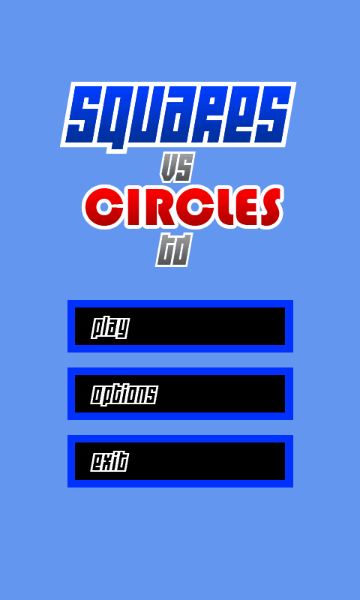
This is the main menu screen. I changed the logo from the original Squares V Circles. This one looks much nicer and suites the game better. I don't have anything going on in the background yet but I have something in mind.
Here is a random level from the game. Some levels will not allow you to have some guns and some won't allow you to upgrade your guns. The blank rectangle at the top of the screen is reserved for ads.

As you hopefully can see I have started to add the first coat of polish(the first of many if I have the patience). 

I haven't really made that much progress I know(one of the reasons might be that I have gotten addicted to Terraria lately) but every step to the finished product counts. I also hope to have more XNA tutorials up soon so check back regularly.

Friday, January 20, 2012

XNA/Monogame Tutorial: Sprite Rotation

When I was learning XNA and Monogame this was one of the things I always wondered how to do. Since then I have learned how to do it and thought it was about time I shared my knowledge. For this tutorial I'm going to show you how to rotate a texture, how to rotate it to point towards another point and how to move the sprite towards that point.

Here is the image I used
First things first open up visual studio and start a new windows game project. Next copy the image above or get your own and add it to your project. Its important to note that the orientation of the image is important. The front of your object should be pointing towards the right.

Next go to your Game1.cs file just below where the spritebatch is declared and declare the variables you will need.
Now go to the LoadContent method and initialize the variables. The speed variable will be used later.
Next up is the Update method. In this tutorial I'm going to use the mouse position as the point the sprite will rotate towards. So lets get the state of the mouse. Were going to use the mousePosition variable to hold the X, Y position of the mouse. Next were going to get the direction vector. We do this by subtracting the mousePosition from the position of our sprite. But we can't use this yet we need to normalize the direction to turn it into a unit vector. We can now use this to find the rotation by using the Math.Atan2 method. I have no idea of the maths behind this method but it works.
Math.Atan2 works on doubles so remember to cast to direction y/x to doubles and also as this method returns a double, remember to add another cast but this time to a float.

Finally we get to the Draw method. One thing to note here is to make sure you have the origin set to the center of your image. So here I'm dividing the width and height of the image by 2 and setting that to be the origin. It is possible to set the origin to be anywhere on your image and the image should rotate around that origin.
If you run this the rocket should point towards your mouse cursor. If you can't see your cursor go to the Initialize method and write: this.IsMouseVisable = true.

Now to make your rocket move towards your mouse cursor at a constant speed. Go to the Update method and just after you set the rotation write the following.
To get this effect you simply multiply the speed you want your rocket to go by the direction vector we calculated earlier and then add this to the position of your rocket.

If you run the project now you should see the rocket follow your mouse cursor no matter where it is.


This is how it should look.

And there ends my first XNA tutorial. If you see any errors or have any questions please leave a comment below.